Showing posts with label green. Show all posts

Friday, March 4, 2011

Color Club The Lime Starts Here

Quickie post today! Lost of things going on around here (some good and some bad) and I really should be getting ready for work but...well. You're more important! Remember how Mr. Kitty ordered me polish for Valentine's Day? This is another of those polishes, this one from the scented Sweet Temptations Collection by Color Club.

Color Club The Lime Starts Here, daylight lamp


The Lime Starts Here is a pretty standard lime neon green (and yum, I love neon green!) that has a sweet sugary scent, very candy-like. Skittles came to mind when I put this on-- the candy, of course! I worried about the scent because some of these scented-type polishes are too strong and give me a headache, but this one didn't bother me at all.


I used three coats of polish with a base and top coat, but no "underwear" polish. Application was a little streaky on the first coat but the second coat settled nicely and the third coat was to build opacity.


There's probably a dupe for this color out there, possibly even one from Color Club. They have a great line of neons. The real draw to this one is the fun of wearing a scented polish. Of course, after a day of wearing it I just couldn't leave it alone and...

Color Club The Lime Starts Here with China Glaze Broken Hearted, sunlight


...yeah, Mr. Kitty got me Crackle polishes too! I still wanted unadulterated green so I left one nail as an accent. After applying the crackle and another layer of top coat, you could still smell The Lime Starts Here. (Once it dried, I mean. Please don't sniff your wet top coat! xD)

What do you think, yay or nay for scented polish?

Sunday, November 28, 2010

Orly Mistletoe

Orly Mistletoe was one of my very first lemmings. I stalked eBay until I found it (along with some Orly a la Modes) for a reasonable price and then it sat in a drawer unswatched for, hmm, about a year. (I had a *moment* where I decided it needed to wait for Christmas). Luckily I had forgotten about it because this meant I didn't build up all sorts of anticipation only to be disappointed. Because I'm rather *meh* about this one.

Orly Mistletoe, morning sun


This is three coats (no top coat) and you can still see bald spots. Maybe it's just my bottle (and coming from eBay it could be), but the polish consistency is very thin. I could have added a fourth coat. I could have worked with it until I was satisfied. But Nars Zulu was sitting there waiting too. And I'm still a bit miffed with Orly's price-raising shenanigans. I went with the gorgeous green jelly.

Monday, September 6, 2010

Color Club Twiggy vs. Quirius Erin Island

Freshie over at Polish Freshie asked me how Color Club Twiggy compared to Quirius Erin Island. This is three coats of each (plus topcoat, I couldn't bear the matte-ish-ness) with Twiggy on the left. I don't know if it makes a difference, but my Twiggy is from one of the sets you can sometimes find at Ross'.

Dodging raindrops, Twiggy vs Erin Island


If you do look at the enlarged picture, please ignore the red bits I missed. *sweatdrops* You'll see what caused that next time!

Tuesday, August 31, 2010

Quirius Erin Island

I'm squeezing this post into the last few hours of the last day of August, desperately trying to ignore how hot & humid it is right now. I don't know where my head is, but I managed to forget to write in my polish notebook what base & top coat combo I used. Somebody take away my polish fiend badge.

Quirius Erin Island, morning sun


Three coats to even out the color. While not completely unworkable, the consistency of this polish is a bit chalky and streaky. But I'm completely gaga over the color. Neon pastel green = Kitty Love. I wish had captured the neon better.

Quirius Erin Island, shade


Note the teensy chips on my middle and ring finger. I have no idea how that happened in less than 12 hours. Obviously this one isn't going to have long staying power on me. Still, gorgeous.

Quirius Erin Island, noon sun with water decal


And finally, I had to add a water decal. Water decals are so much easier for me than nail stickers. This particular design is from the blogger sample pack I got from Viva La Nails last month. If you've never used water decals before, there's a nice video tutorial on their website.

Wednesday, August 11, 2010

NYX Girls Swatches I

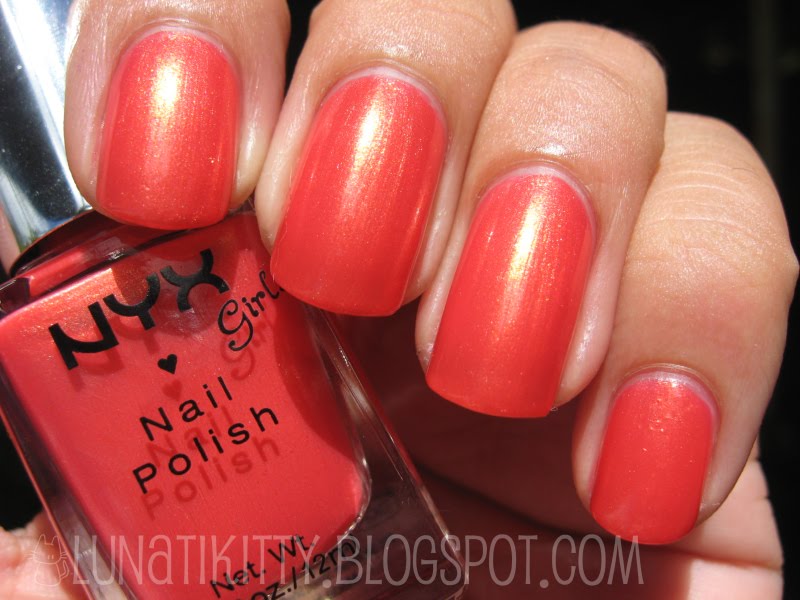
I've been feeling a little down this month, but nothing a little retail therapy can't help. =D Over the weekend, I discovered one of the local grocery stores is stocking NYX Girls in the pharmacy section. At 1.59 each, I couldn't resist buying a few (or eight!). I thought I'd show you a few swatches today. Being swatches, these have no base or top coat.

NYX Girls Luscious Green, 2 coats, morning sun


NYX Girls The Taupe, 2 coats, morning sun


NYX Girls Chick Lit, 2 coats, morning sun


Anneliese, sneaking out the window!


I was surprised at how well these applied. Luscious Green seemed thin on the first coat, but the second coat was so smooth and easy. There is a bit of a bald patch on my pinky, but that's because I goofed getting my camera out. I thought I fixed it up alright, but cameras don't lie, lol.

The Taupe (haha, I love that name for some bizarre reason) had an unusual consistency. Not bad, just...different. I don't quite know how to explain it. At first I thought it was going to be horribly streaky, but I just let it be and each coat self-leveled. I think if I had tried to fix it I would have created problems. Left alone, it took care of itself. And so shiny!

Chick Lit was like Luscious Green. A nice smooth application, a bit thin on the first coat, but with a nice color payoff on the second. I'm in serious like with that one. Overall, I think these are great for the price. They certainly cheered up my day!

Friday, August 6, 2010

A Layering Experiment (Warning! Pic heavy!)

Last week I wore Zoya Yasmeen and Zoya Tallulah, both lovely polishes, but the sun refused to come out long enough for me to take decent pictures. Rather, the sun came out while I was at work & I'm not brave enough to take pictures of my nails at work, lol. I can only imagine the questions I'd get.

Anyway, I gave up on waiting for the sun and moved on to a new manicure, a layering experiment that's been simmering in my head for a few weeks. I probably took too many pictures. Rather than go on and on about it, I'll just let you see for yourself. XD


I'm in love. I didn't want to take it off. Eventually I had to, the tip wear was pretty bad. Oh wait, you want to know what its made of? Here ya go (in the order of layering):


Hot Topic Iridescent Blue was the first layer. A Perfect "10" The One was next (this is very similar to Pure Ice Oh Baby). Third layer was BT Snow Angel, a polish brand I've only seen in this one clothing store in the mall. There are other polishes out there with that golden-green glitter, I'm sure. And finally Nfu-Oh 52, gorgeous thing that she is.

So what do you think? Did I do good? I've got another idea simmering that involves reds...

Wednesday, July 14, 2010

Quirius Caribbean Turquoise & China Glaze Grape Pop + Hidden Treasure

Depending on the lighting, Quirius Caribbean Turquoise can lean a bit more towards green or blue. I did the best I could to take pictures of the awesome. Really, I think its my new favorite turquoise! I feel a bit guilty, I've had this first pic uploaded and waiting for almost a week. BUT, I also wore this color for 5 days! So I took a picture of that too so you can see how well it wore.

Quirius Caribbean Turquoise, overcast sun


This was three coats of polish over Nailtek II Foundation and topped with Poshe Fast Drying topcoat. Two coats of polish would have been fine, but I was watching House while doing my nails and accidentally put a third coat on my pinky...I got a little obsessive and *had* to make sure they all had the same amount of layers. *blushes*

The polish consistency was a little thick. Not chalky, but it did have some cuticle drag if you went over the same spot twice too quickly. Easily remedied by just letting each layer dry a bit. It does dry semi-matte so you'll have to add topcoat for shine (if you want that, of course!). Otherwise, pigmentation is very good. Caribbean Turquoise pops quite nicely without the white layer some neons require underneath to really show off their potential.

As I said earlier, I wore this for five days with minimal tipwear and no chips!

Quirius Caribbean Turquoise, Day Five


And, because it was holding up so well, I decided to pull out some the the nail art supplies I was sent by Viva La Nails and attempt some nail art. I'm thinking I'm not nearly as talented in this area as other bloggers, lol.


What the heck, if you've kept reading this long, here's a picture of China Glaze Grape Pop topped with a layer of Sally Hansen Hidden Treasure. Sadly, Grape Pop didn't fare as well, this tipwear is after only one day of wear. Same number of coats, same base & topcoat combo as the Caribbean Turquoise. Still pretty though! (Ouch, my poor dry and abused cuticles!)

China Glaze Grape Pop + Sally Hansen Hidden Treasure


And now, I'm going to be late for work so you all have a beautiful day!

Wednesday, April 21, 2010

Golden Rose & No. 146

A few weeks ago I first read about Golden Rose at Black Nail Polish and Lip Gloss and was tempted by the idea of a red holo polish, so I placed an order! (Of course, the free shipping on orders over $20 really helped sway me too, lol) I haven't had time to swatch them, but I did want to show you what I ordered and I did a full manicure with No. 146 that you can see at the end. Now, these polishes don't have names, only a number so I've added it to the pictures for your convenience.

First up are from the Golden Rose Paris line. The bottle size on these (I don't believe it is mentioned on the website) is 11ml or 0.37fl oz. Number 113 is from the Paris Holographic colors. Number 86 is from the regular Paris line.


These next two are from the Super Shine & Lasting line. Bottle size is 10ml or 0.34fl oz. Number 146 is the one I chose to try first. (Which is why there's such a large air bubble in the bottle...I did a full manicure before I remembered to take pictures, hehe.)


Can you tell I was having fun taking these pictures? These are from the Care + Strong line. The purple of Number 166 is not quite color accurate; it is a bit more red toned than my camera would capture. Notice the bar glitter? I think these will be nice glitter topcoats. Bottle size is 11ml or 0.37fl oz.


And finally, the cutie babies of the bunch. Numbers 58 and 36 are from the Fashion Color line. Number 119 is from the Holographic Color line. Bottle size on these is 6ml or 0.20 fl oz.


You've waited so patiently! This is what you really came for, the manicure pic! Two coats plus base coat and quick dry top coat, taken under a daylight lamp due to a depressing lack of sun.

Golden Rose 146


Application was great. The polish consistency wasn't too thin or too thick, it flowed smoothly from brush to nail and didn't drag. The brush itself was nicely shaped and the bristles spread just the right amount. I did no cleanup for these photos. The color is lovely, a soft purple with a strong blue-green shimmer. It is a bit sheer, but a third coat would fix that. I bet it would look great layered over a purple cream.

The sun peeked out for all of half an hour one day, so I snapped a quick picture. This is after four working days of wear. You can see there is slight tipwear but no chips.


Overall I think this is nice, reasonably-priced brand with a good range of colors. Prices for the polishes I've shown you ranged from $1.49 for the Fashion Colors to $3.49 for the Paris Holographic. The site I ordered from (here) only ships within the USA, but these polishes are made in Turkey. I'm sure with a bit of searching you can find them outside the US. I tried searching myself, but the sites I found weren't in English and I couldn't be sure you could actually order from them. So, tell me what you want to see next!

Monday, April 5, 2010

Icing Roger That

I have another great polish from Icing to show you today. This is Roger That, a sparkly jelly-like teal.

Icing Roger That, 3 coats, shade


Icing Roger That, 3 coats, sun


Application was almost absurdly easy. Smooth and streak-free at two coat, I chose to do a third coat because of visible nail line. I didn't have to do any cleanup, that's how well behaved this polish was. If only all polishes were this easy to apply!

Thursday, March 25, 2010

Maybelline & Hot Topic

Finally, the last two bottles from my weekend haul! One is a drugstore brand and the other is from Hot Topic. To refresh: these are swatches only, so no base or top coat and pictures were taken under a lamp due to lack of sun.

Maybelline Exu-Blue-Rant - 2 coats


Exu-Blue-Rant is from Maybelline's Poptimistic collection. This is a highly pigmented polish which was almost a one-coater. If you apply your layers on the thicker side, you could probably do just one coat. I like this blue creme. I find it straightforward and refreshing. Its a great dark blue that looks blue, even indoors. No application issues.

Hot Topic Mint - 3 coats


There are so many things I want to say about this polish I don't know where to begin. First of all, this photo isn't color accurate. It should be less blue and more minty green. I tried everything I could think of until I just gave up because swatching this polish was just so frustrating.

The trouble started with the crap brush. I know it happens with Hot Topic polishes, but this was extra-crappy. Uneven bristles and falling apart. I had to trim them and even pulled some out just so I could swatch. Then the consistency seemed to be a bit thick and goopy. It may need to be thinned, or I was having trouble getting even layers because of that darn brush! At two coats, it was still streaky, then the third was lumpy. I stopped trying because I knew a fourth coat would just mean taking it all off and starting again. And then I forgot to take a bottle pic. *sigh* I do like the color though, which means I'll decant this into a better bottle and thin it and try again. One day.

Wednesday, March 17, 2010

OPI Jade Is the New Black

I did manage to get some sunlight pictures in today, yay! So even though St. Patrick's is over for most of the world, I'm going to squeeze this in during the last few hours here in Hawaii. This is the other polish the nice ladies at Trade Secret held for me from OPI's Hong Kong collection.

OPI Jade Is the New Black


I had no cleanup tools with me when I did this, so I apologize for any stray bits o' green. This is two not-too-thin and not-too-thick coats plus Poshe topcoat. Somehow I managed to forget to apply basecoat even though it was sitting right there by my hand. Silly me. Smooth application, no issues with pooling, cuticle drag or streaking.


When I first put Jade Is the New Black on, I wasn't sure I liked it. But now that I've worn it all day, I'm rather fond of it. This polish is a bright dusty green creme, if that makes sense. It's making me think of old money. Not fugly, wrinkled, dirty dollar bills, but CLEAN old money. Like the first dollar bill taped into my baby scrapbook. Somehow I don't think that's the image Suzi was going for, heh.


And I'm really sorry about my dry cuticles. I didn't notice them until after I uploaded the pics *whips out moisturizer*

Tuesday, March 16, 2010

Claire's Dream Catcher

Word around MakeupAlley's nail care board is that Claire's Dream Catcher is a dupe for that limited-edition-insanely-priced-on-eBay Chanel Jade nail polish. I don't own the Chanel so I can't say if its true or not. What is true is that Dream Catcher is quite pretty.

Three coats in full sun. This is actually about 3 days wear. I thought my pictures of this were gone for good when the computer threw a fit, but I found these on my camera. Yay for forgetfulness and taking too many pictures! Loving the subtle shimmer.


And for fun, another picture when the sun hid behind some (heh, more like a whole lot of) clouds.


After seeing this polish so much on MUA and other blogs, I really wanted to try it out but my local Claire's didn't have it. I checked almost every week and finally I gave up, deciding I must have missed it completely. Then last week I stopped by to look for the new mood-changing polishes (which they didn't have) and lo and behold, there were tons of Dream Catcher in the clearance bin. I know for a fact those were never on the regular shelf. Go figure. But I got my lemmng and I'm happy =)

Monday, March 15, 2010

KOTD: Icing Awkward + China Glaze L8R G8R

Heh, I ended up wearing Icing Awkward for almost a week. Really L.O.V.E. that color. The third day I wore it my new Konad plates from OCNailArt arrived in the mail. Naturally I had to test one out immediately. Just to make sure it was working properly, of course. At least that's what I told my husband. Heh heh.


The weather has been nice, so I pulled out China Glaze L8R G8R from the OMG! collection for the stamping. The design is from Konad plate M66.


Pics are clickable for larger images. Apologies for the tip wear, work has been taking a toll on my nails lately =(

Wednesday, March 10, 2010

Icing Awkward

First of all, I apologize for the lack of posts. My computer had a hiccup and it took a little while to figure out the problem. Sadly, I lost a few sets of photos, but happily I backup my files frequently.

Today I'm wearing a green that I love, Icing Awkward. Greens have a tendency to make my skin look redder in photographs than is true in real life, but the polish color is accurate. This is 3 coats, outdoors, but slightly overcast. Application is fair. I had a little bit of cuticle drag on the first coat, but it evened itself out.


This is, to me, a perfect moss green. Unfortunately I couldn't find any of the moss I'm thinking of to show it to you, so you'll just have to trust me. =)

Tuesday, February 9, 2010

Icing Manic Monday

I tried something new while painting my nails. When the time for cleanup came, instead of using my orange wood stick, I tried using a nice stiff paintbrush dipped in acetone.

Me + paintbrush = FAIL

You can totally see where I missed spots and even managed to get polish in my cuticles where there was no polish originally. I'm almost too embarrassed to post this, but I want to show you the base for what I did the next day.

First, a bottle pic of today's polish under a daylight lamp, Icing Manic Monday.


Pretty color, very dark though. I took the next photo outside, midday sun. I don't know what was going on that day, but I kept getting dust on my hands when I would go outside no matter what I did.


This was two coats of polish that applied very smoothly. Color is highly pigmented. Outside on a sunny day, you can definitely tell this polish is a deep green. Indoors under fluorescent lighting it really starts to lean toward black unless the lighting is blindingly bright. Overall the polish itself is nice, but my skills were sadly lacking and I just wasn't feeling it that day. So what do I do when I'm not feeling our manicure? I layer something over it! But that will have to be a post for another day.